
 木盒主机
木盒主机通过本文你可以学到什么
- 如何调用机器翻译接口
- 通过API 3.0 Explore体验机器翻译
- 通过API 3.0 SDK调用机器翻译接口
- 通过自行鉴权调用机器翻译接口及类似API3.0接口
前置准备
我们在准备调用机器翻译接口前,需要一些准备工作,主要包括
- 注册腾讯云账号
- 开通机器翻译服务
- 申请安全凭证
以下为各步骤的详细功能
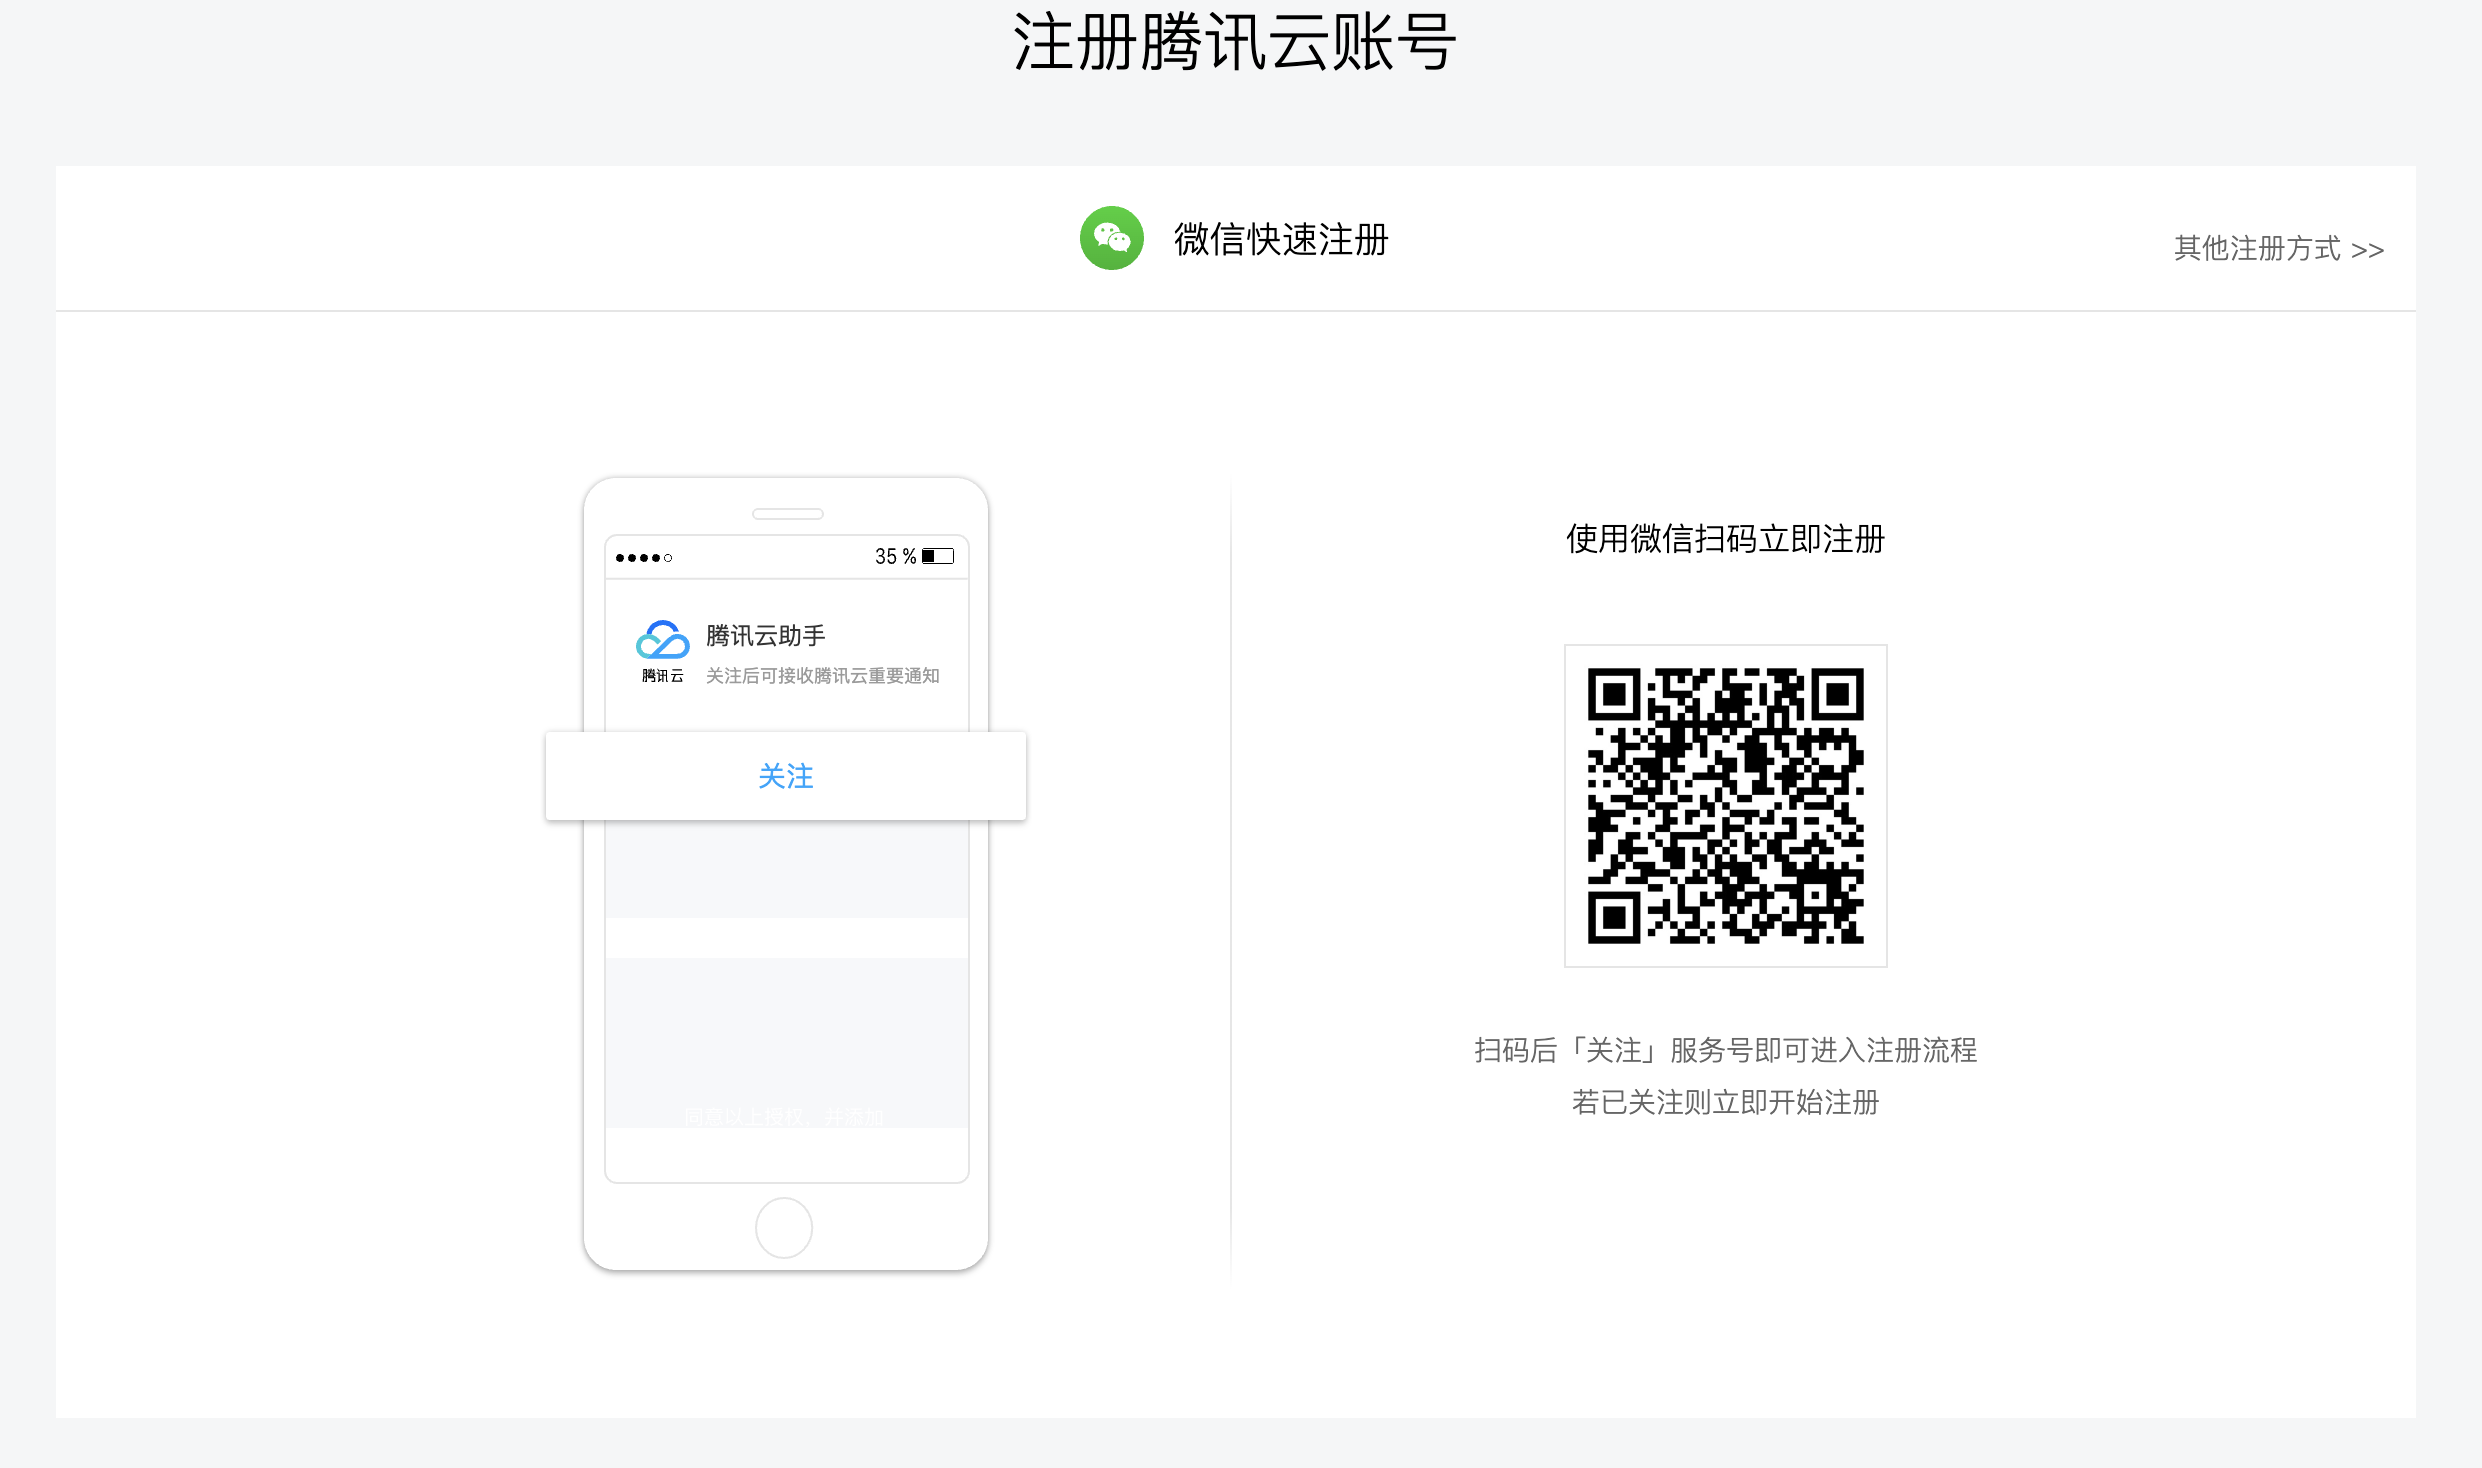
1. 注册腾讯云账号
通过https://cloud.tencent.com/register注册腾讯云账号
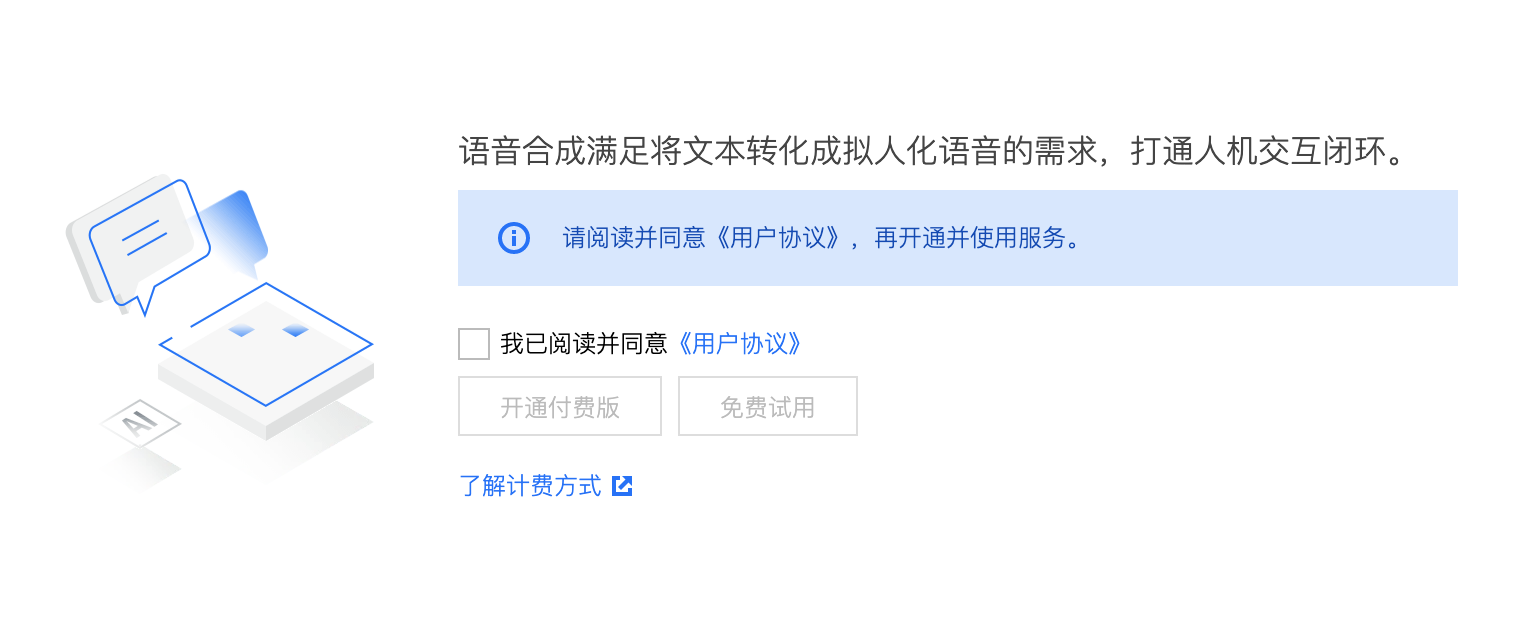
2. 开通机器翻译服务
在机器翻译控制台https://console.cloud.tencent.com/tmt开通机器翻译服务
因笔者已经开通机器翻译服务,所以截取了语音合成的控制台,机器翻译的开通界面类似。
勾选我已同意,选择免费试用即可,若免费额度用完,需要开通付费,到时开通即可
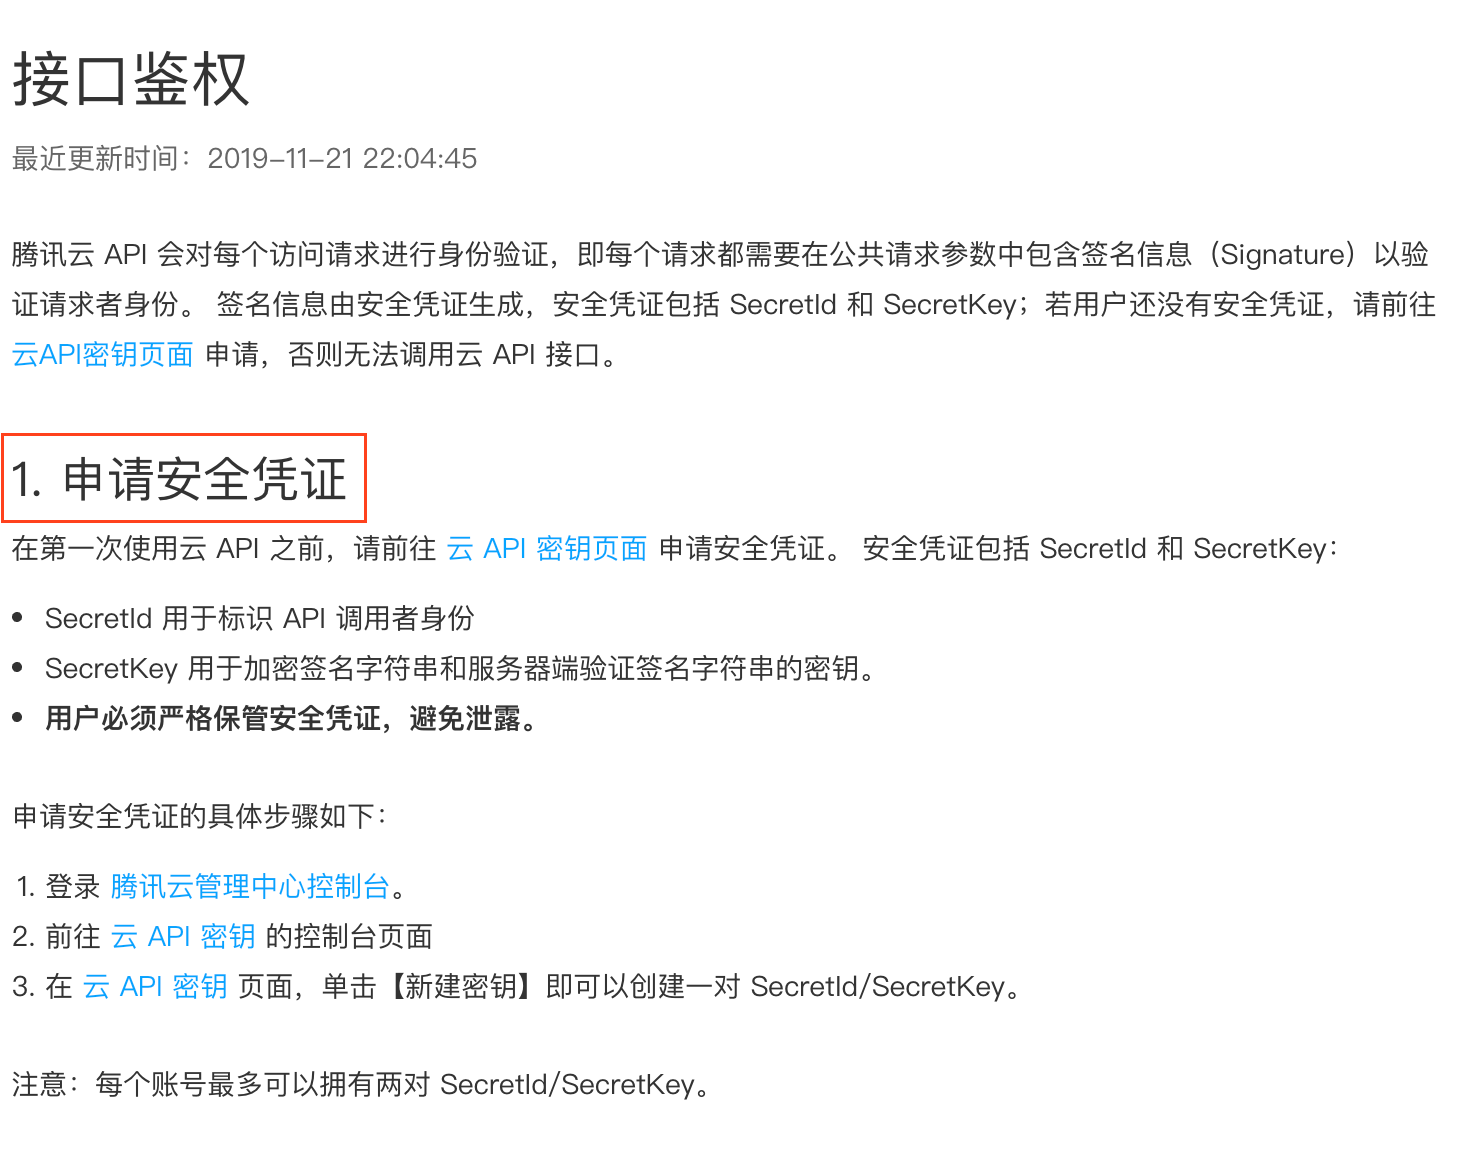
3. 申请安全凭证
申请安全凭证即SecretId和SecretKey
参考该链接的https://cloud.tencent.com/document/api/213/15693的第一步即可
通过API 3.0 Explore体验机器翻译
API 3.0 Explore是腾讯云提供的一个在线API测试工具,该工具提供了在线调用、签名验证、SDK 代码生成和快速检索接口等能力,可以让你快速体验产品功能,显著降低使用难度
通过该链接https://console.cloud.tencent.com/api/explorer?Product=tmt&Version=2018-03-21&Action=TextTranslate&SignVersion=可以直接前往机器翻译的文本翻译界面
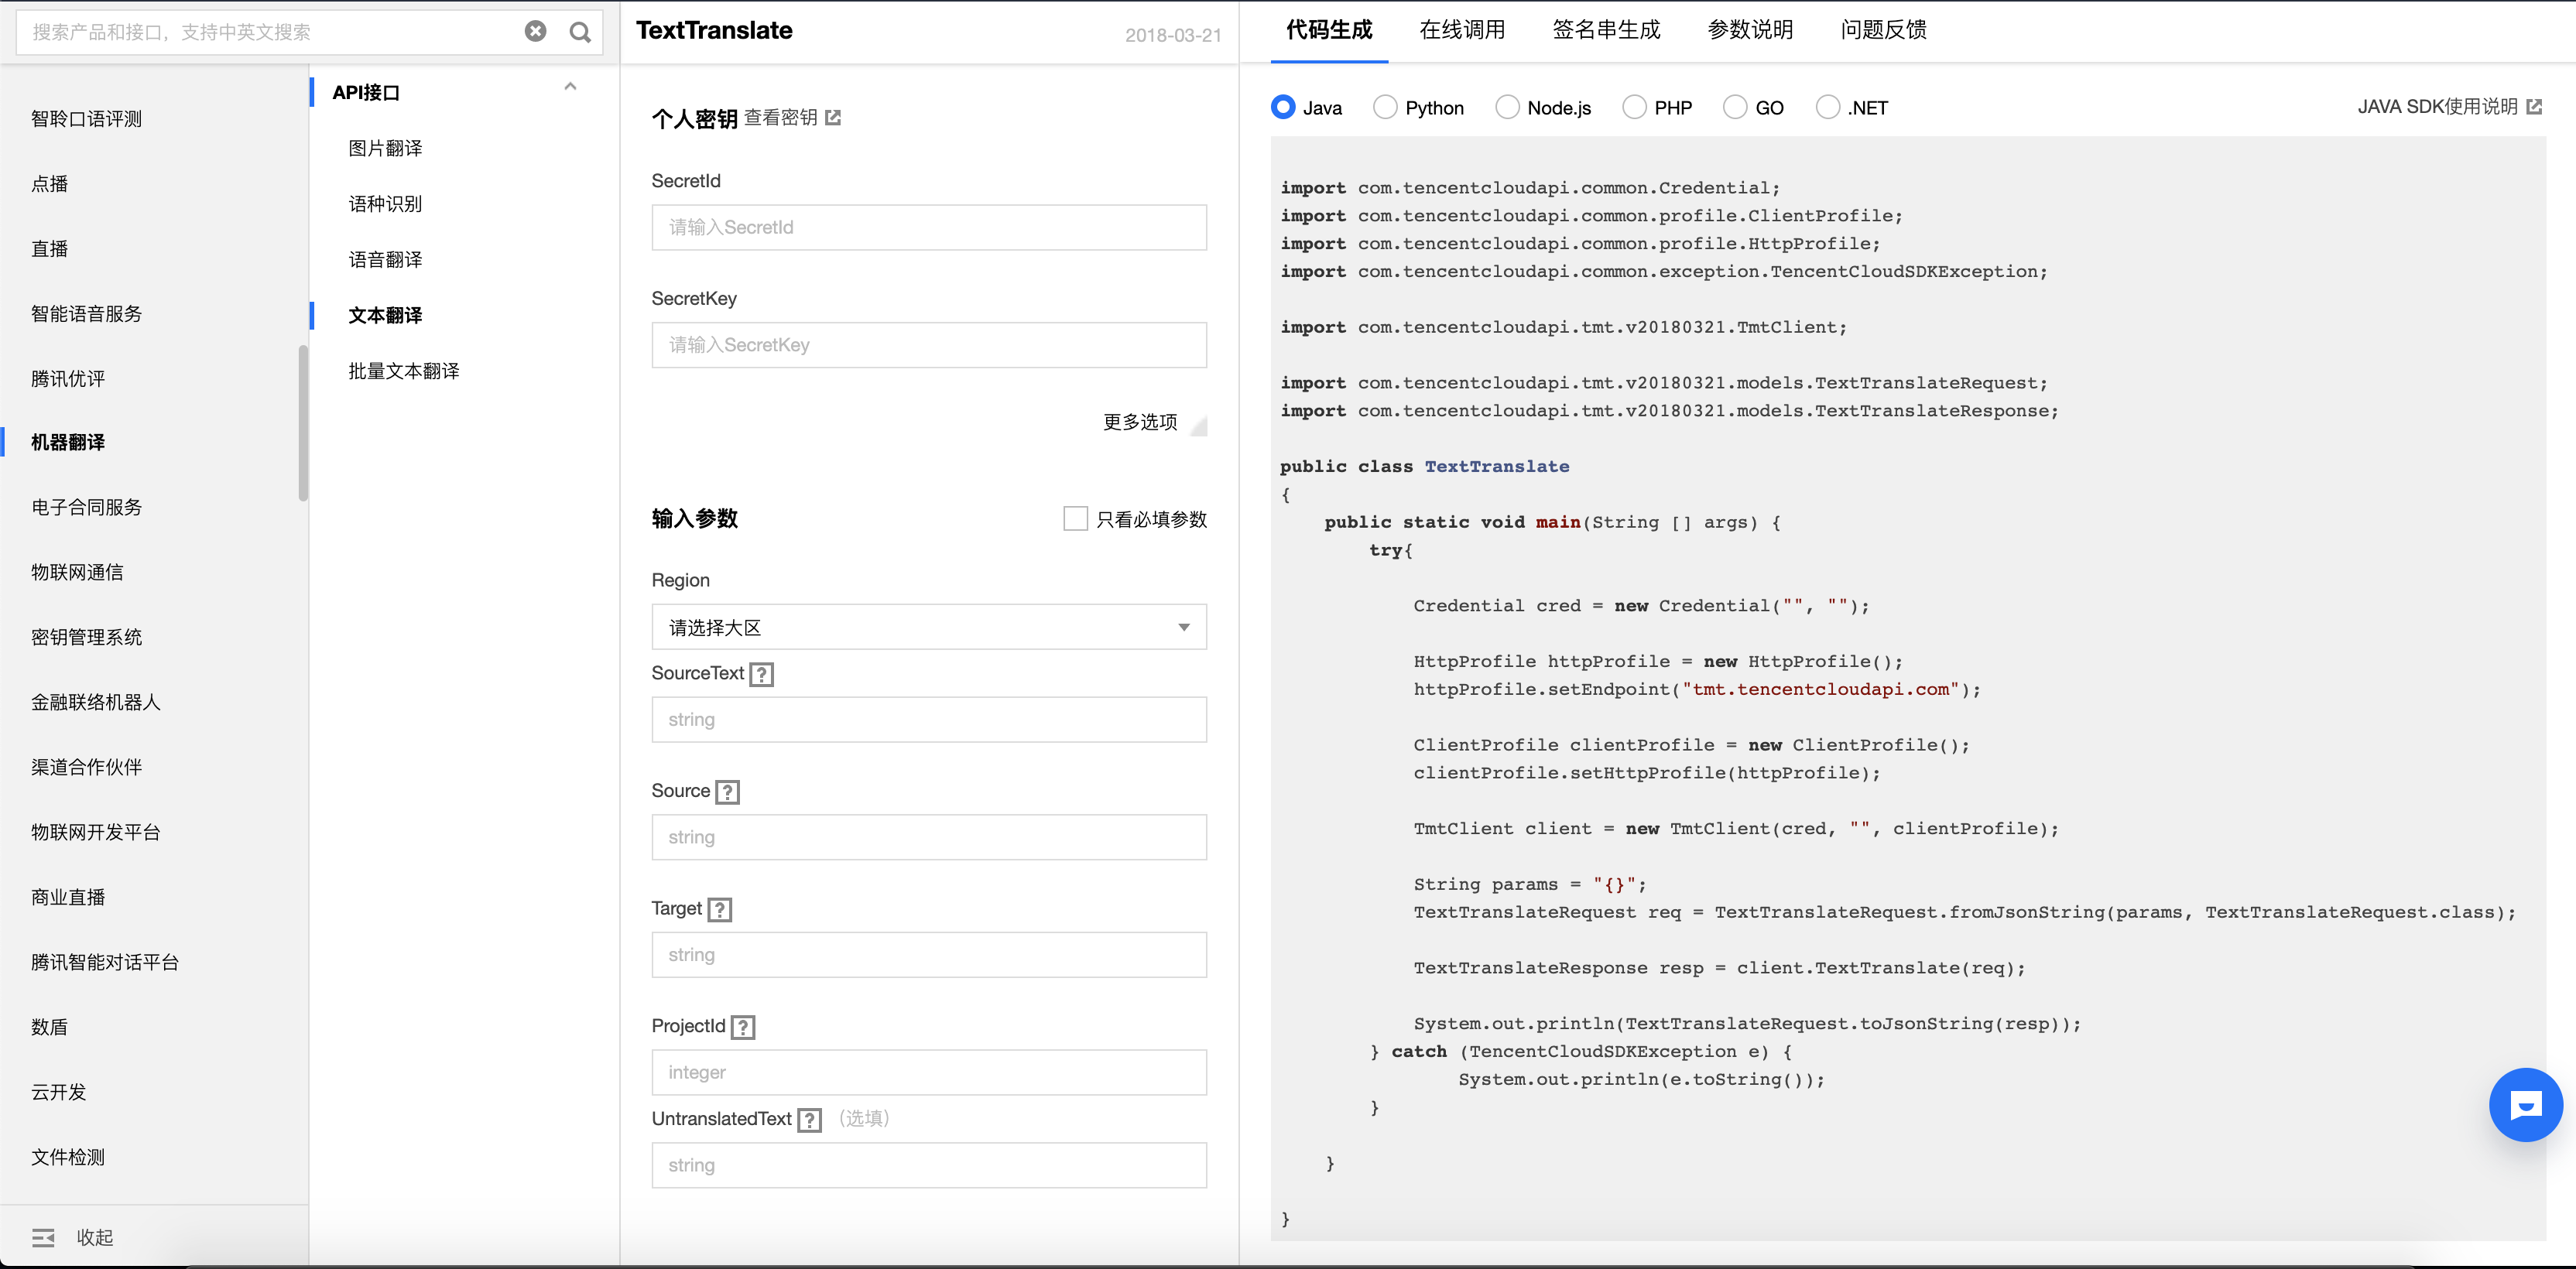
左侧可以选择产品和相应接口,我们选择机器翻译和它的文本翻译接口
在线调用
通过API Explore,我们可以快速的进行在线调用,以体验API功能
我们先在右侧选择参数说明,以了解文本翻译的参数及意义

在了解了需要的参数,我们在左侧栏填写相应的值,其中最重要的是将自己前面申请的安全凭证SecretId和SecretKey填写正确,如下图所示
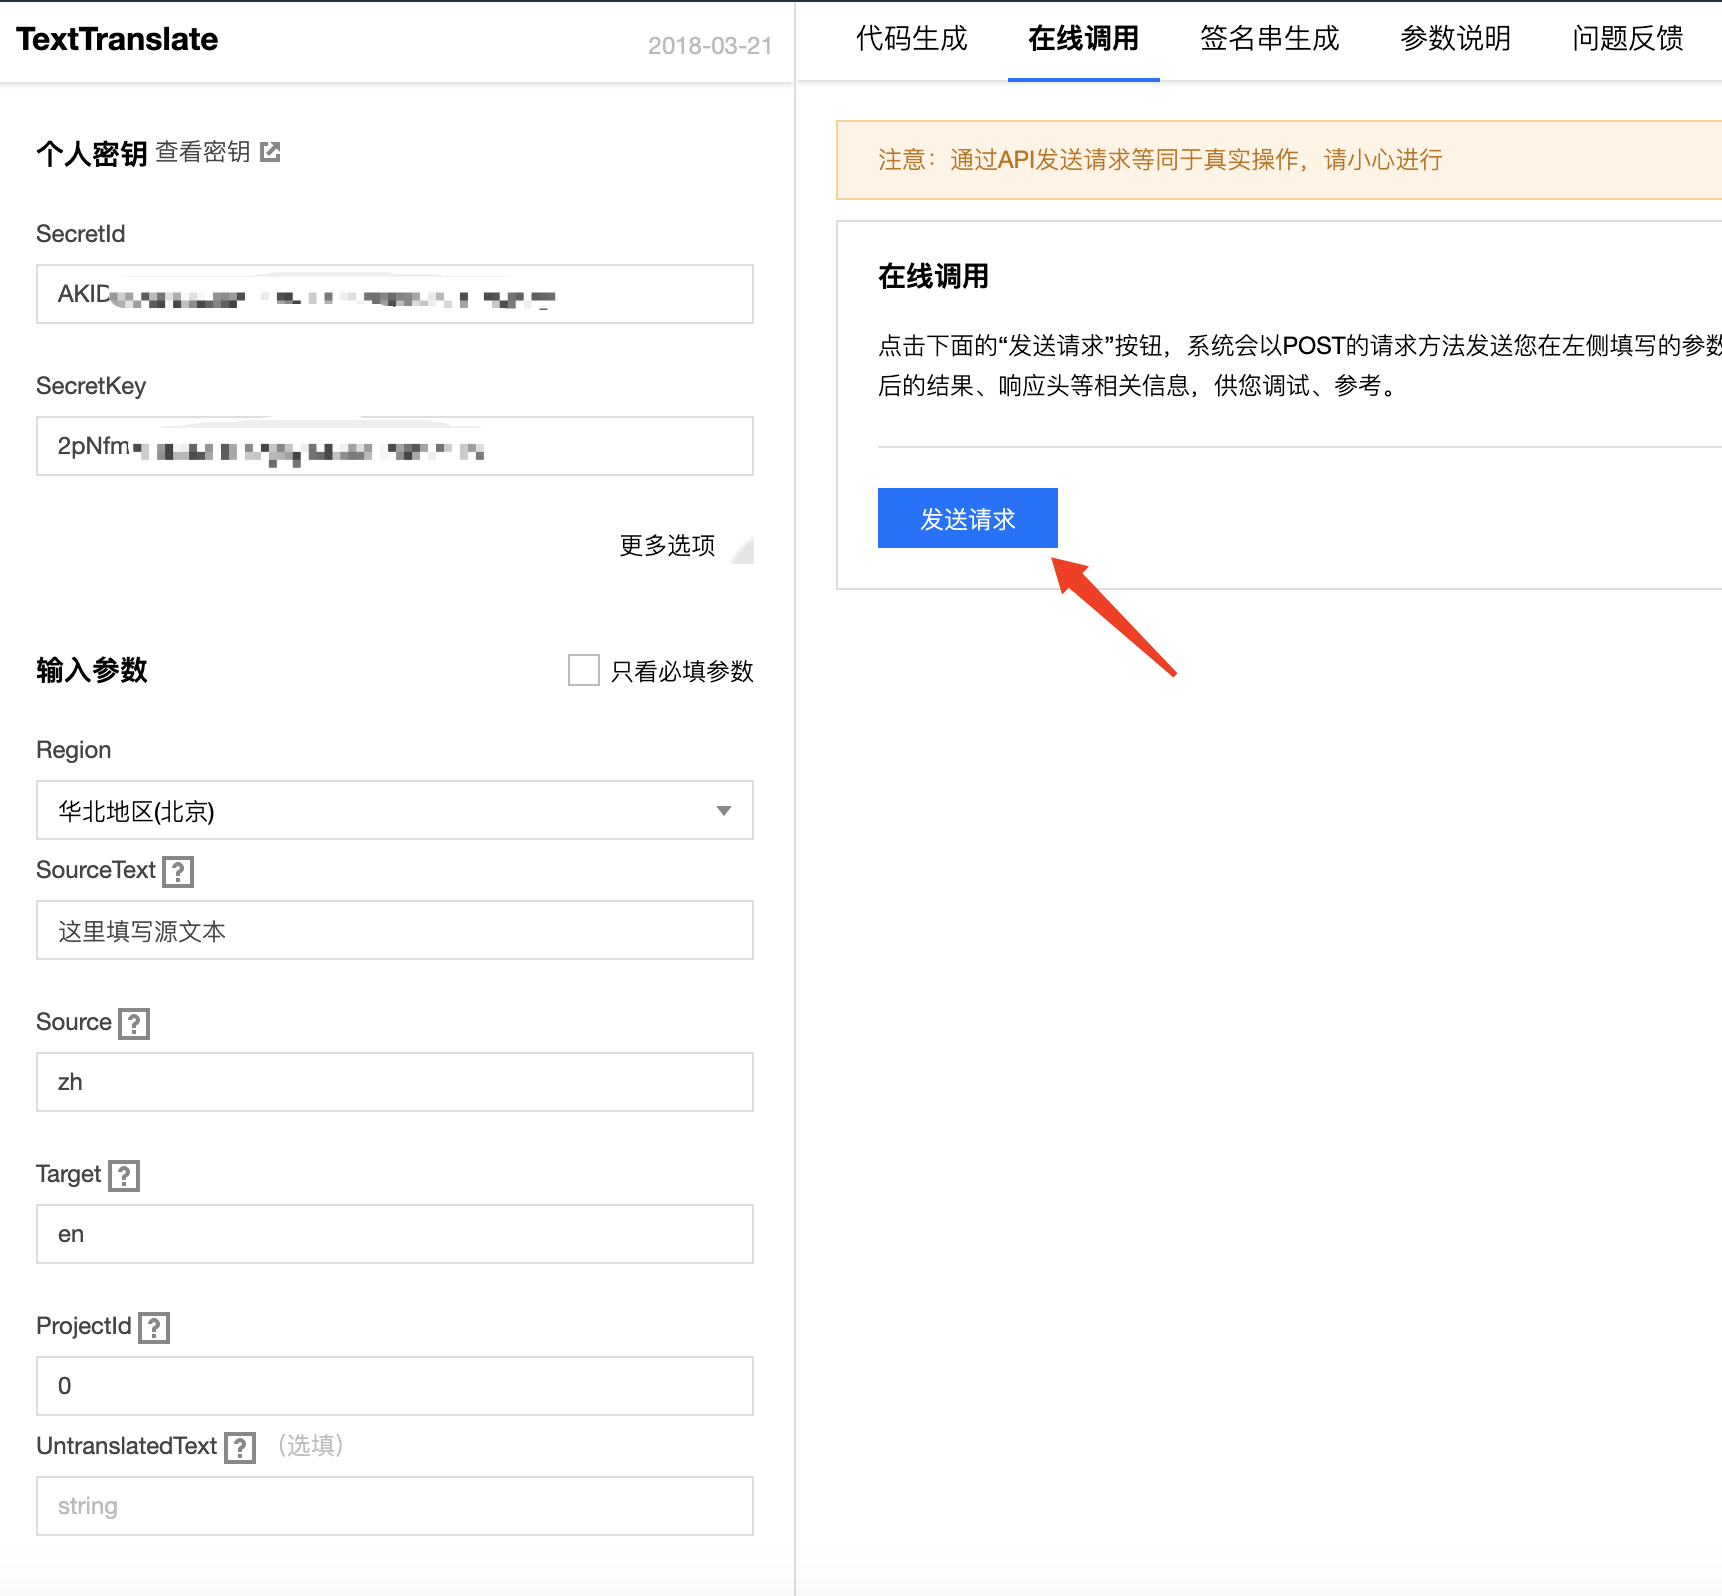
点击发送请求,即可拿到翻译结果
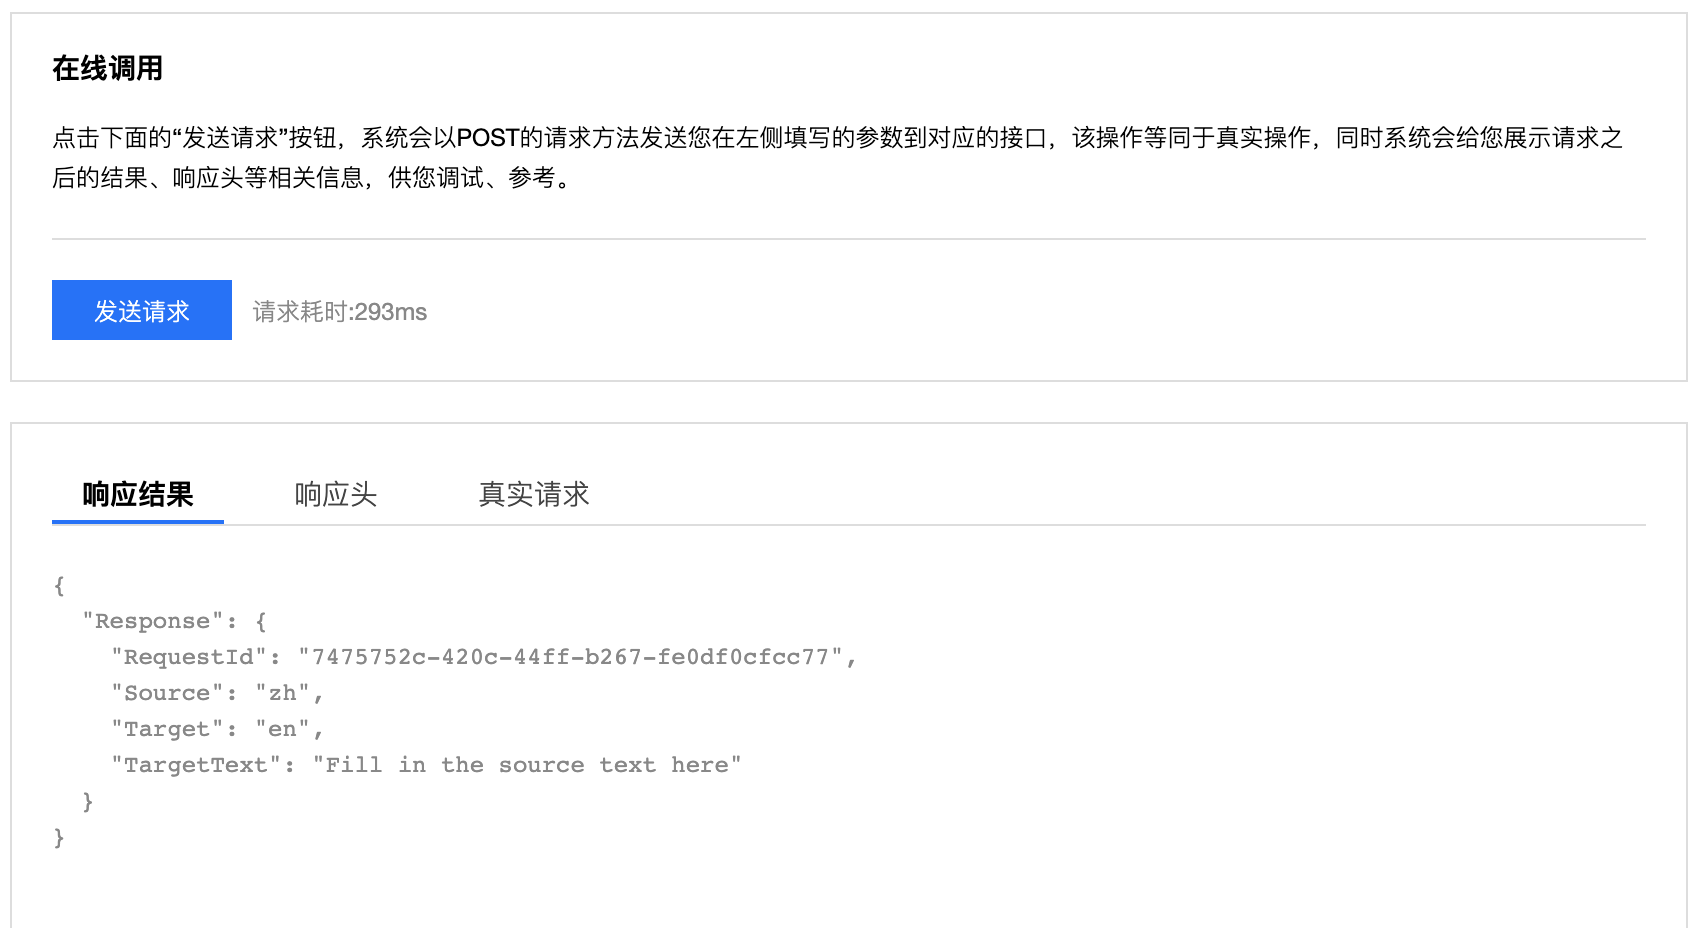
是不是很简单呀~
通过腾讯云API3.0 SDK调用接口
通过API 3.0 Explore我们可以在线测试接口的功能是不是满足自己的要求,那么要集成到自己的产品中,还是要使用代码来调用,而腾讯云为我们提供了各语言的SDK,来帮助我们调用接口
如下链接https://cloud.tencent.com/document/api/551/15619
下面我们以Python语言为例,展示如何通过Python的云API SDK来调用文本翻译接口
SDK的安装方式参考https://github.com/TencentCloud/tencentcloud-sdk-python即可
这里我们又回到API Explore,它提供了根据参数直接生成SDK代码的功能,如下图所示
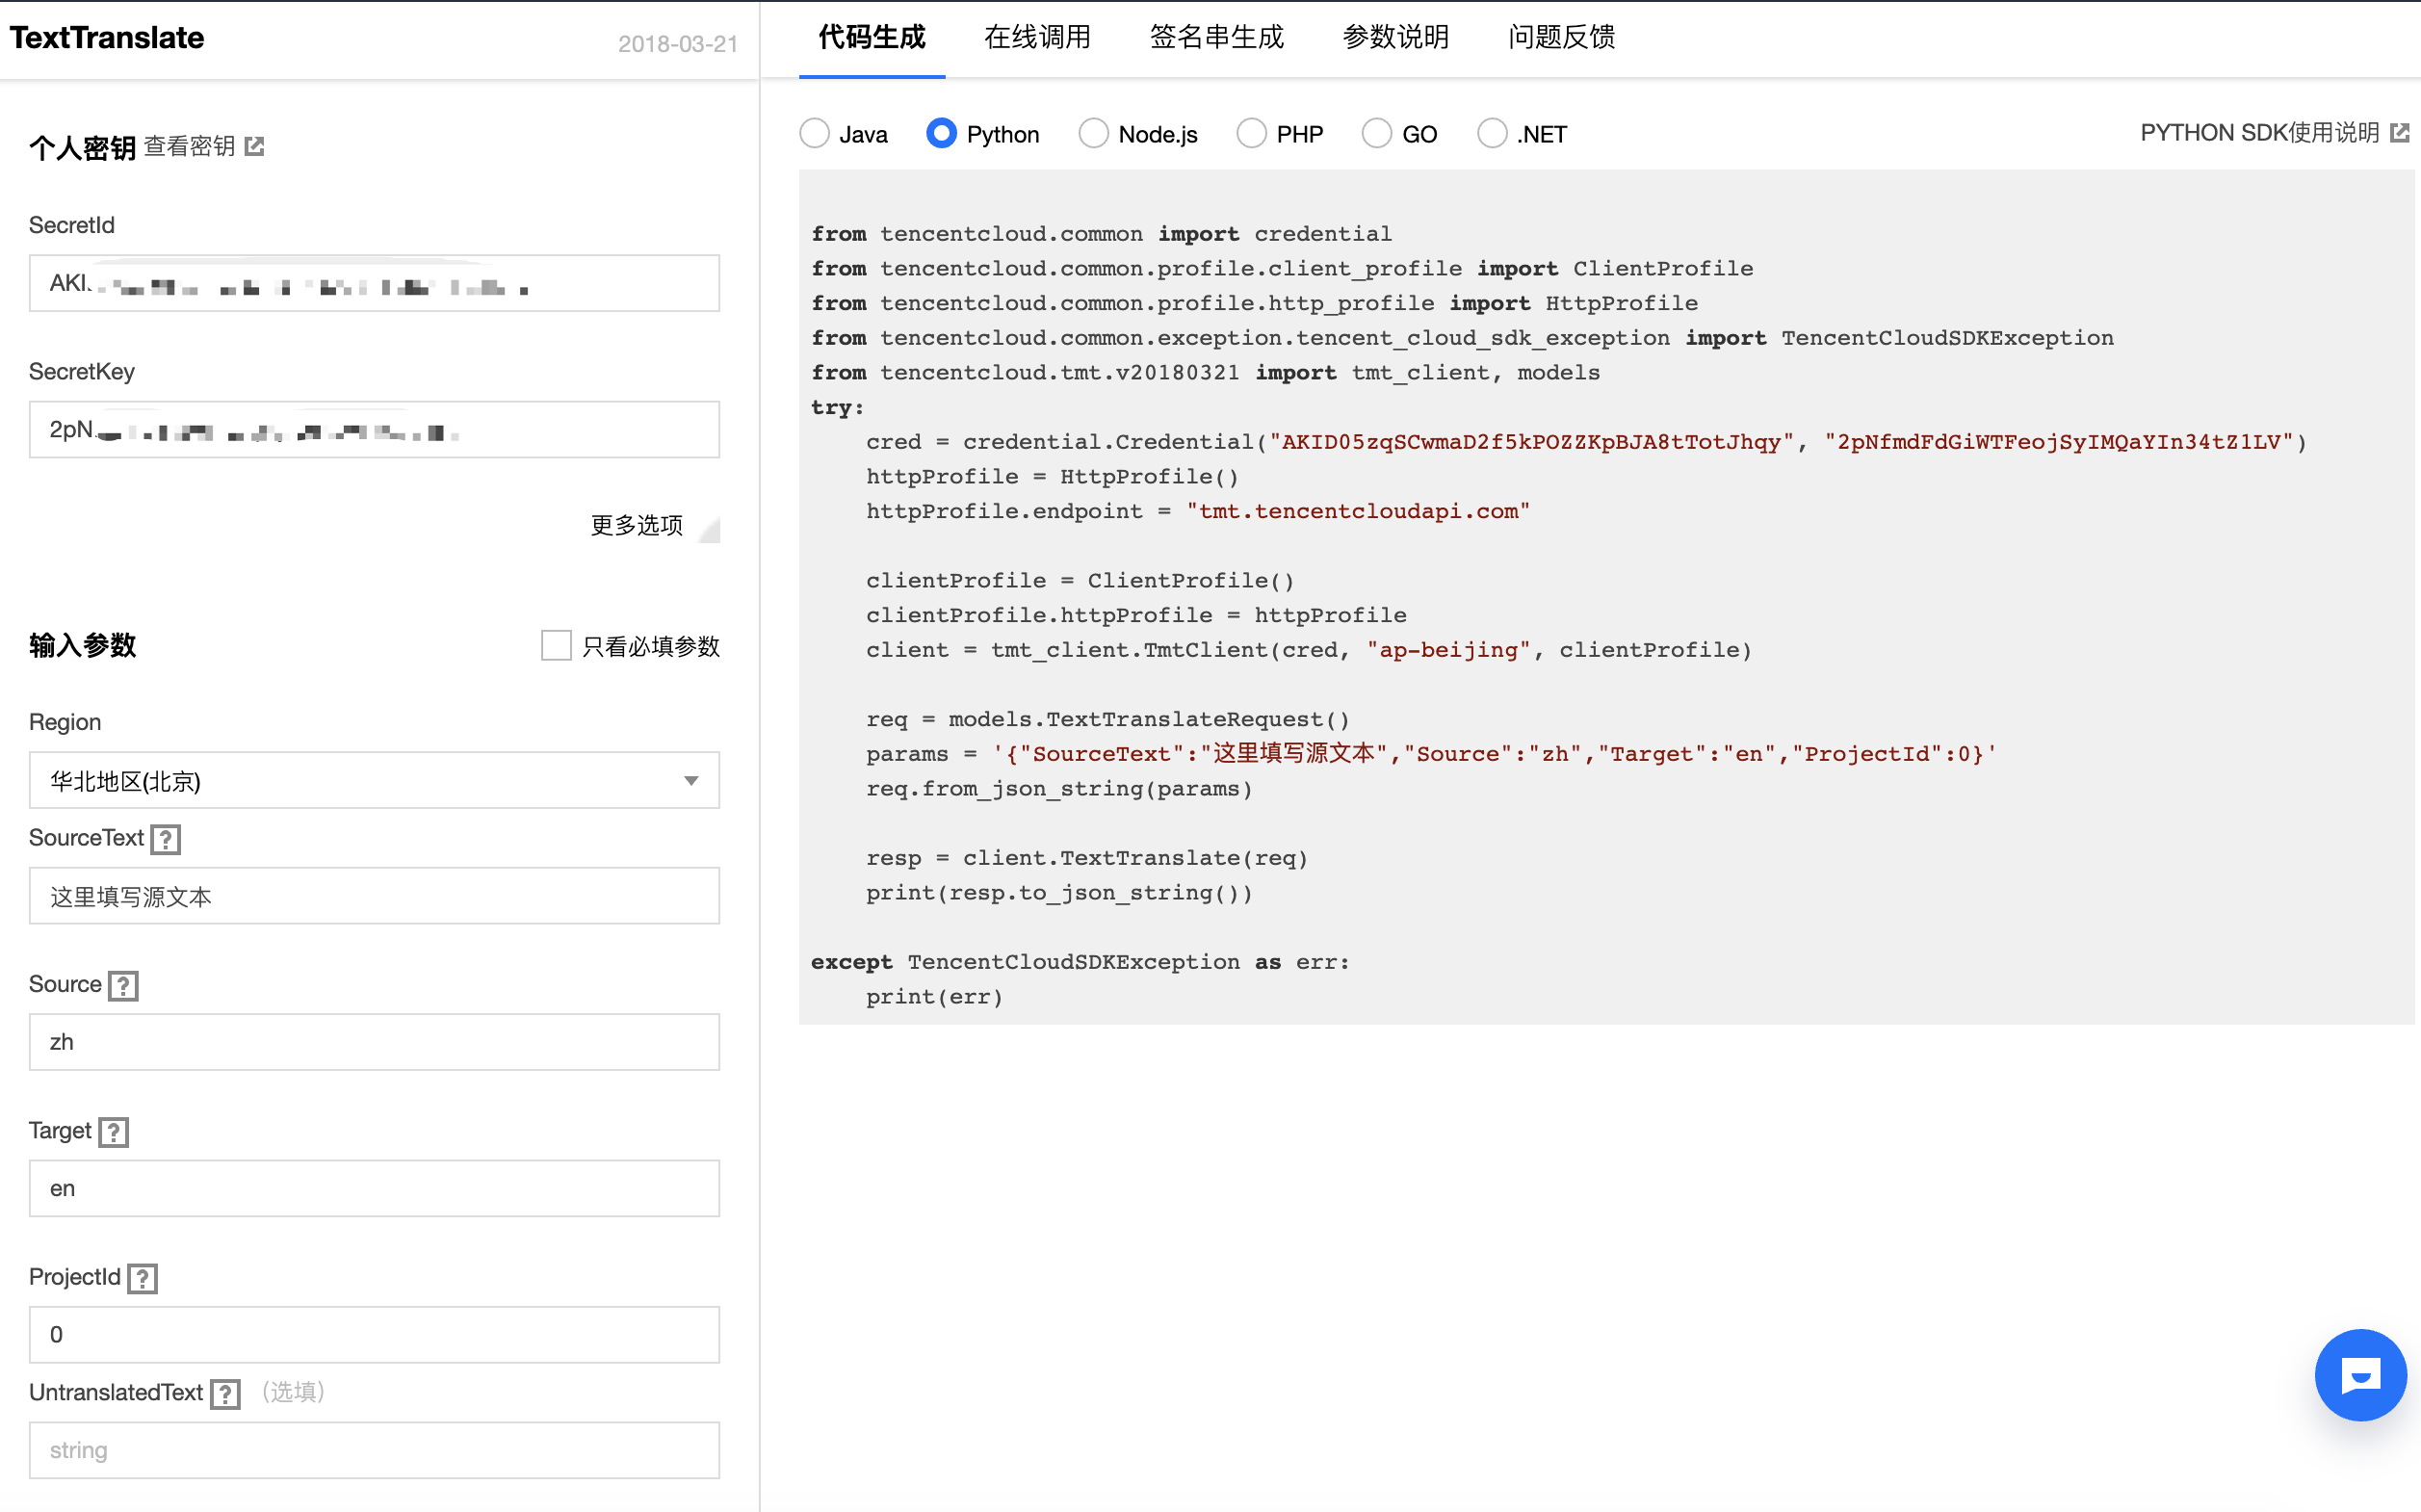
我们直接将代码拷贝到本地执行
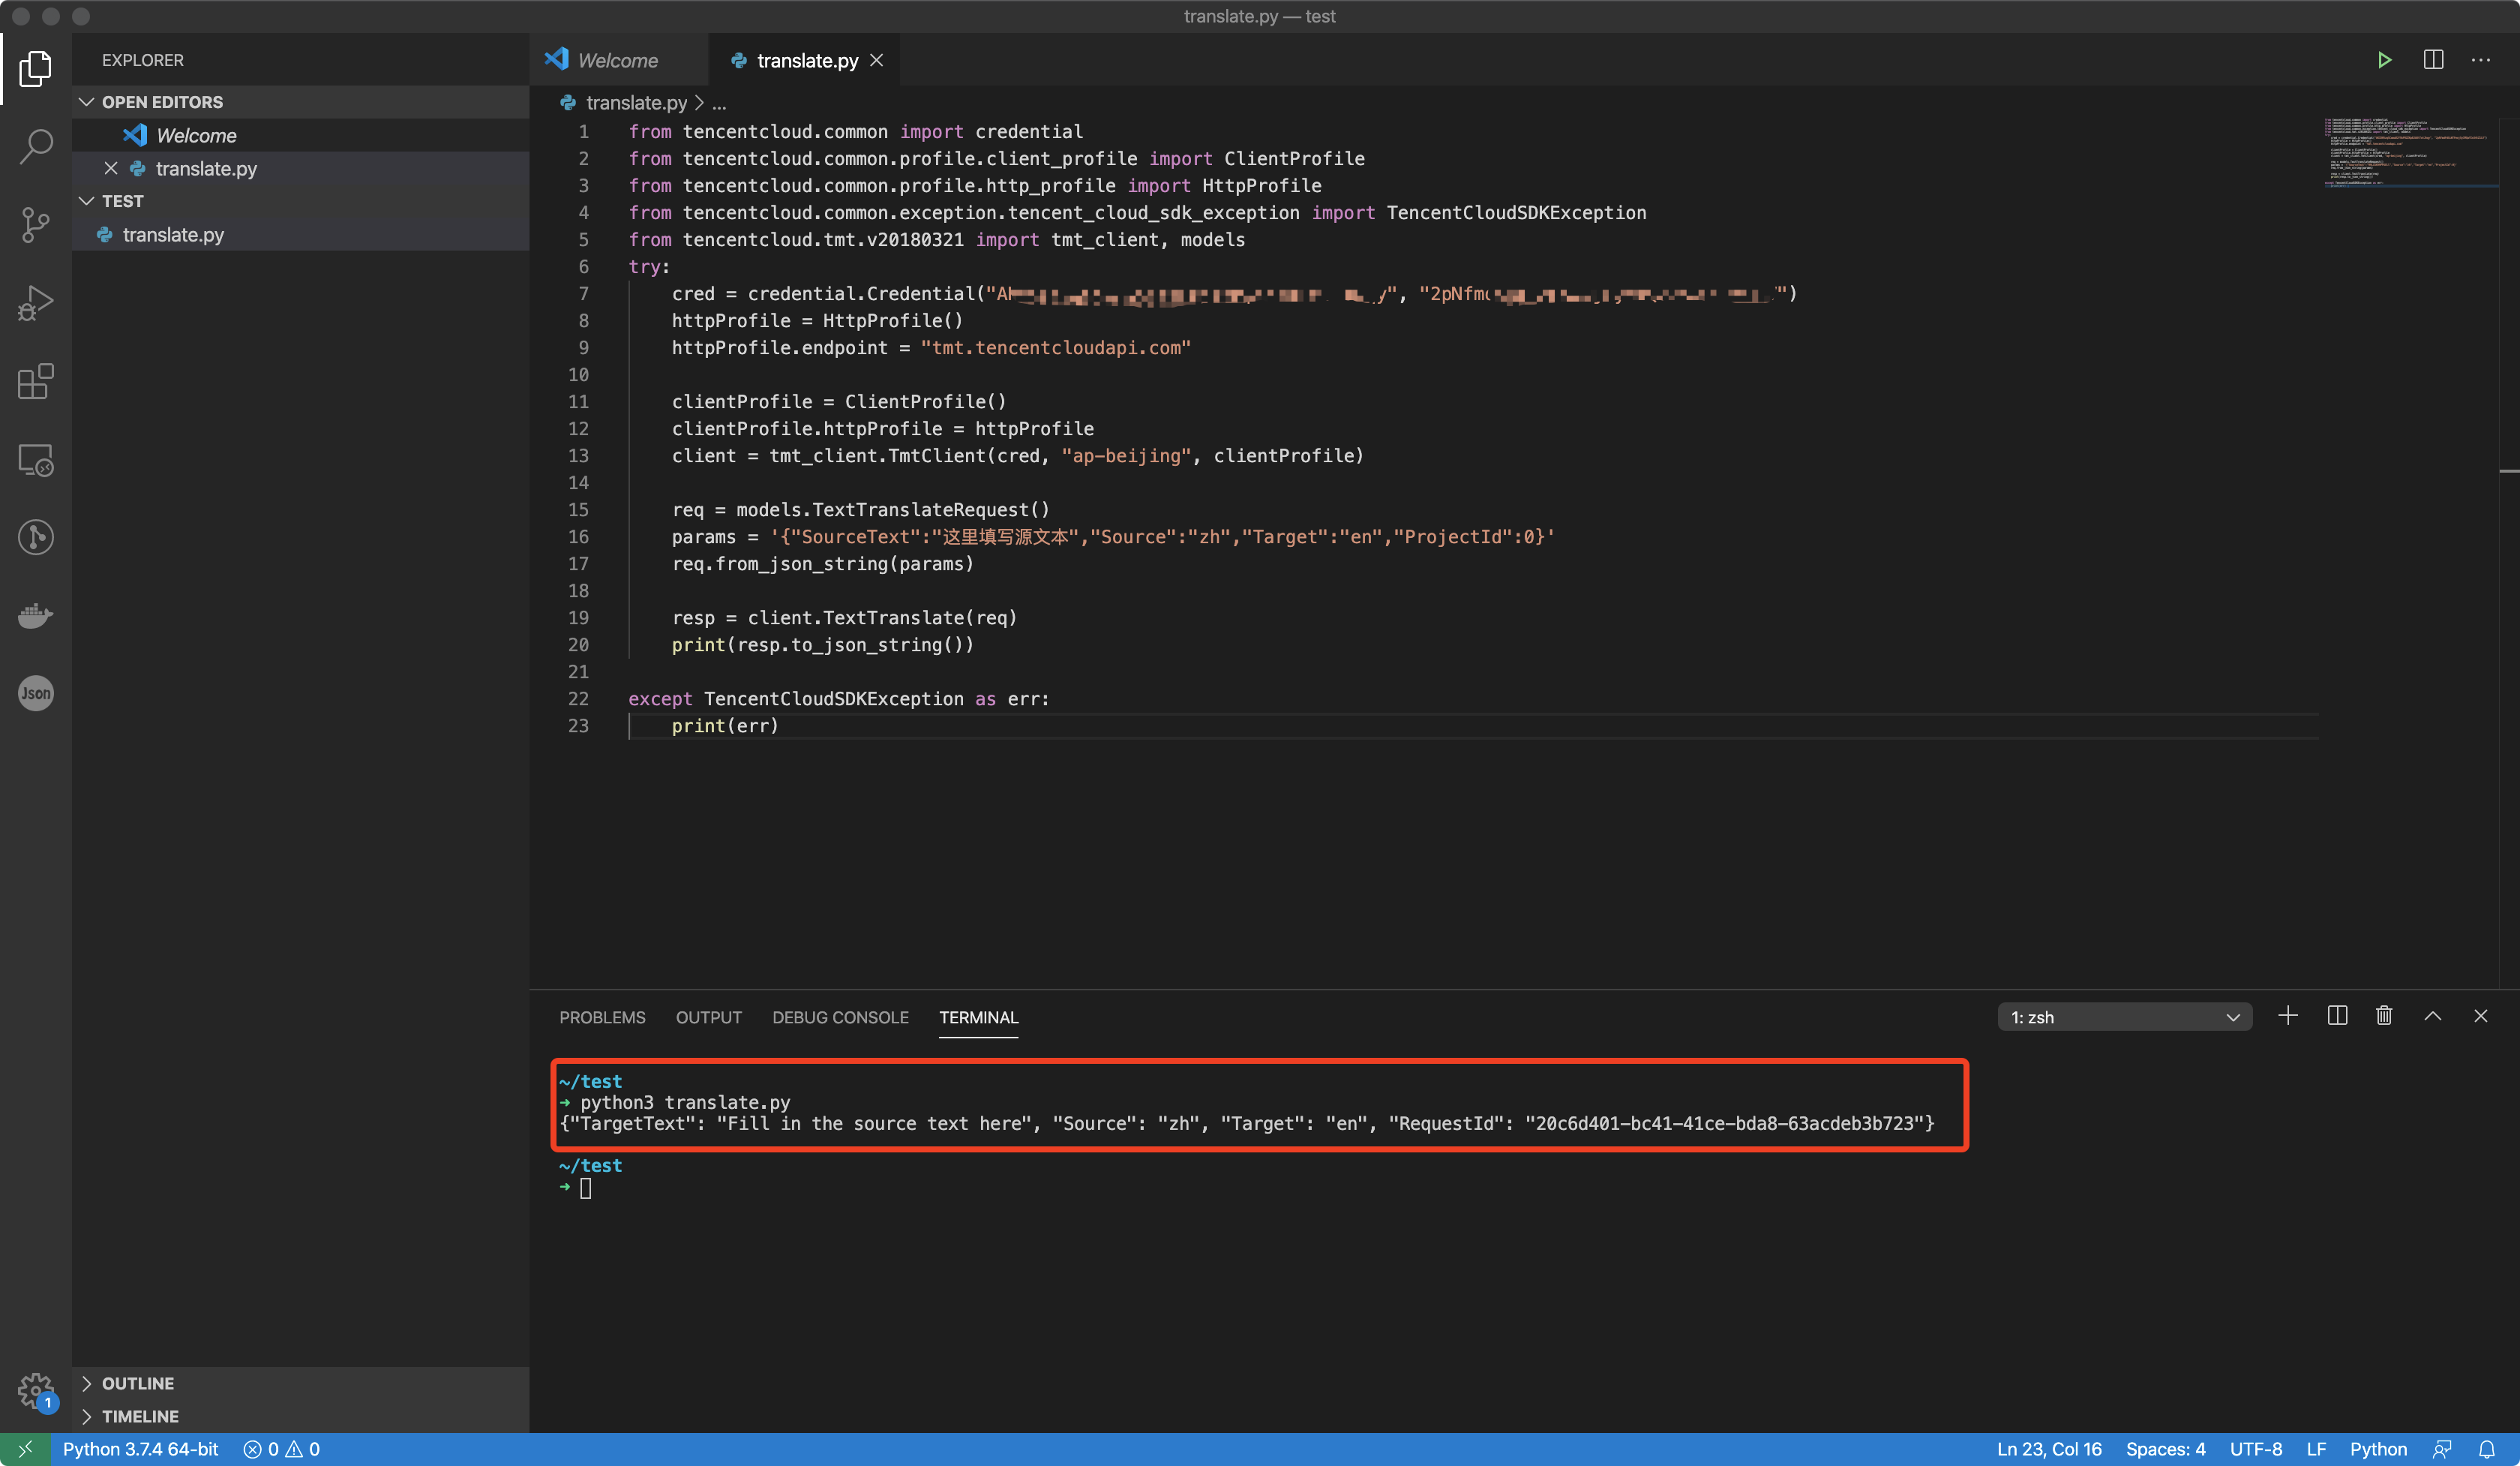
可以看到原样拷贝的代码直接执行成功了
但是自动生成的代码是通过字符串的形式生成请求体的,可能不方便我们只好自定定制,我们可以稍作改造,以结构体的方式填写参数,方便定制化
from tencentcloud.common import credential
from tencentcloud.common.profile.client_profile import ClientProfile
from tencentcloud.common.profile.http_profile import HttpProfile
from tencentcloud.common.exception.tencent_cloud_sdk_exception import TencentCloudSDKException
from tencentcloud.tmt.v20180321 import tmt_client, models
try:
    cred = credential.Credential("你的SecretId", "你的SecretKey")
    httpProfile = HttpProfile()
    httpProfile.endpoint = "tmt.tencentcloudapi.com"

    clientProfile = ClientProfile()
    clientProfile.httpProfile = httpProfile
    client = tmt_client.TmtClient(cred, "ap-beijing", clientProfile)

    req = models.TextTranslateRequest()
    req.SourceText = "这里填写源文本"
    req.Source = "zh"
    req.Target = "en"
    req.ProjectId = 0

    resp = client.TextTranslate(req)
    print(resp.to_json_string())

except TencentCloudSDKException as err:
    print(err)
自行鉴权调用文本翻译接口
有时候,我们不方便通过API 3.0 SDK集成入自己的产品来调用接口,可能是语言限制可能是平台限制等,我们希望自行调用腾讯云接口来使用其相关功能
具体腾讯云接口鉴权流程参考该链接https://cloud.tencent.com/document/api/213/30654
自行鉴权的代码流程:https://cloud.tencent.com/document/product/551/30636
以下为调用文本翻译接口的全代码
import json
import time
from datetime import datetime
import hashlib
import hmac
import requests


def get_sign(host, timestamp, service, req_payload, secret_key, secret_id):
    service = service
    algorithm = "TC3-HMAC-SHA256"
    timestamp = int(timestamp)
    # timestamp = 1551113065
    date = datetime.utcfromtimestamp(timestamp).strftime("%Y-%m-%d")
    content_type = "application/json; charset=utf-8"
    signed_headers = "content-type;host"

    # ************* 步骤 1:拼接规范请求串 *************
    http_request_method = "POST"
    canonical_uri = "/"
    canonical_querystring = ""

    canonical_headers = "content-type:%s\nhost:%s\n" % (content_type, host)
    hashed_request_payload = hashlib.sha256(req_payload.encode("utf-8")).hexdigest()
    canonical_request = (http_request_method + "\n" +
                         canonical_uri + "\n" +
                         canonical_querystring + "\n" +
                         canonical_headers + "\n" +
                         signed_headers + "\n" +
                         hashed_request_payload)
    print(canonical_request)

    # ************* 步骤 2:拼接待签名字符串 *************
    credential_scope = date + "/" + service + "/" + "tc3_request"
    hashed_canonical_request = hashlib.sha256(canonical_request.encode("utf-8")).hexdigest()
    string_to_sign = (algorithm + "\n" +
                      str(timestamp) + "\n" +
                      credential_scope + "\n" +
                      hashed_canonical_request)
    print(string_to_sign)

    # ************* 步骤 3:计算签名 *************
    # 计算签名摘要函数
    def sign(key, msg):
        return hmac.new(key, msg.encode("utf-8"), hashlib.sha256).digest()

    secret_date = sign(("TC3" + secret_key).encode("utf-8"), date)
    secret_service = sign(secret_date, service)
    secret_signing = sign(secret_service, "tc3_request")
    signature = hmac.new(secret_signing, string_to_sign.encode("utf-8"), hashlib.sha256).hexdigest()
    print(signature)

    # ************* 步骤 4:拼接 Authorization *************
    authorization = (algorithm + " " +
                     "Credential=" + secret_id + "/" + credential_scope + ", " +
                     "SignedHeaders=" + signed_headers + ", " +
                     "Signature=" + signature)
    print("authorization:", authorization)
    return authorization


secret_id = "你的SecretId"
secret_key = "你的SecretKey"
host = "tmt.tencentcloudapi.com"
content_type = "application/json; charset=utf-8"
signed_headers = "content-type;host"

translate_url = "https://" + host

print("text translate url: %s" % translate_url)

Action = "TextTranslate"
Version = "2018-03-21"
Region = "ap-beijing"
Source = "zh"
Target = "en"
ProjectId = 0
q = "这里填写源文本"

post_data = {
    "Source": Source,
    "Target": Target,
    "ProjectId": ProjectId,
    "SourceText": q,
}

payload = json.dumps(post_data)
timestamp = time.time()
Authorization = get_sign(host, timestamp, "tmt", payload, secret_key, secret_id)
headers = {"X-TC-Action": Action,
           "X-TC-Region": Region,
           "X-TC-Timestamp": str(int(timestamp)),
           "X-TC-Version": Version,
           "Authorization": Authorization,
           "Content-Type": content_type,
           "host": host,
           "SignedHeaders": signed_headers}

r = requests.post(translate_url, headers=headers, verify=False, data=payload)
print(r)
print(r.content)未经允许不得转载:木盒主机 » 【玩转腾讯云】【腾讯云机器翻译TMT】机器翻译入门
 搬瓦工VPS最新优惠码 搬瓦工最高优惠6.81%优惠码 promo coupon code
  RackNerd:美国VPS 黑五优惠折扣 1核768RAM $10.28/年+神秘盒子 可随机减免金额
 10G.BIZ【年终钜惠】美国/日本/韩国/香港独立服务器 秒杀仅24起,站群仅需99,三网CN2GIA五折抢购。CERA洛杉矶云服务器仅2.4起
 2022年RackNerd 美国VPS促销:4TB月流量11.88美元/年,支持支付宝,老优惠$9.89美元/年