GitHub
goharbor/harbor
harbor的简介
Harbor是一个用于存储和分发Docker镜像的企业级Registry服务器,通过添加一些企业必需的功能特性,例如安全、标识和管理等,扩展了开源Docker Distribution。作为一个企业级私有Registry服务器,Harbor提供了更好的性能和安全。提升用户使用Registry构建和运行环境传输镜像的效率。Harbor支持安装在多个Registry节点的镜像资源复制,镜像全部保存在私有Registry中, 确保数据和知识产权在公司内部网络中管控。另外,Harbor也提供了高级的安全特性,诸如用户管理,访问控制和活动审计等。
Harbor特性
基于角色的访问控制 :用户与Docker镜像仓库通过“项目”进行组织管理,一个用户可以对多个镜像仓库在同一命名空间(project)里有不同的权限。
镜像复制 : 镜像可以在多个Registry实例中复制(同步)。尤其适合于负载均衡,高可用,混合云和多云的场景。
图形化用户界面 : 用户可以通过浏览器来浏览,检索当前Docker镜像仓库,管理项目和命名空间。
AD/LDAP 支持 : Harbor可以集成企业内部已有的AD/LDAP,用于鉴权认证管理。
审计管理 : 所有针对镜像仓库的操作都可以被记录追溯,用于审计管理。
国际化 : 已拥有英文、中文、德文、日文和俄文的本地化版本。更多的语言将会添加进来。
RESTful API : RESTful API 提供给管理员对于Harbor更多的操控, 使得与其它管理软件集成变得更容易。
部署简单 : 提供在线和离线两种安装工具, 也可以安装到vSphere平台(OVA方式)虚拟设备。
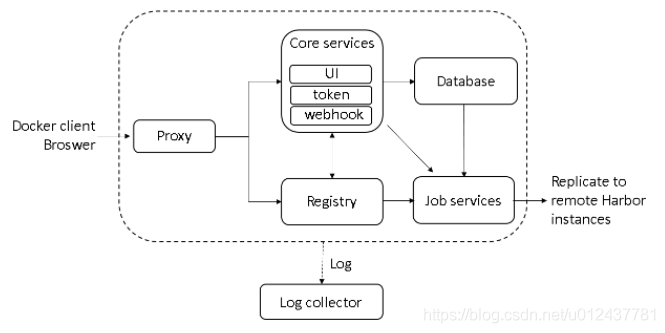
Harbor组件,Harbor在架构上主要由6个组件构成:
Proxy:Harbor的registry, UI, token等服务,通过一个前置的反向代理统一接收浏览器、Docker客户端的请求,并将请求转发给后端不同的服务。
Registry: 负责储存Docker镜像,并处理docker push/pull 命令。由于我们要对用户进行访问控制,即不同用户对Docker image有不同的读写权限,Registry会指向一个token服务,强制用户的每次docker pull/push请求都要携带一个合法的token, Registry会通过公钥对token 进行解密验证。
Core services: 这是Harbor的核心功能,主要提供以下服务:
UI:提供图形化界面,帮助用户管理registry上的镜像(image), 并对用户进行授权。
webhook:为了及时获取registry 上image状态变化的情况, 在Registry上配置webhook,把状态变化传递给UI模块。
token 服务:负责根据用户权限给每个docker push/pull命令签发token. Docker 客户端向Regiøstry服务发起的请求,如果不包含token,会被重定向到这里,获得token后再重新向Registry进行请求。
Database:为core services提供数据库服务,负责储存用户权限、审计日志、Docker image分组信息等数据。
Job Services:提供镜像远程复制功能,可以把本地镜像同步到其他Harbor实例中。
Log collector:为了帮助监控Harbor运行,负责收集其他组件的log,供日后进行分析。
各个组件之间的关系如下图所示:
harbor的安装
安装Harbor需要先安装docker和docker-compose,docker安装参考本作者前面的博客,
docker-compose的安装,先下载二进制文件
<code style="margin-left:0">curl -L "https://github.com/docker/compose/releases/download/1.23.2/docker-compose-$(uname -s)-$(uname -m)" -o /usr/local/bin/docker-compose</code>
赋予二进制文件可执行权限
<code style="margin-left:0">chmod +x /usr/local/bin/docker-compose</code>
测试是否安装成功
<code style="margin-left:0">[root@server1 ~]# docker-compose --version
docker-compose version 1.23.2, build 1110ad01</code>
开始安装harbor,安装方式分为在线安装和离线安装两种方式这里我们安装v2.3.4版本的
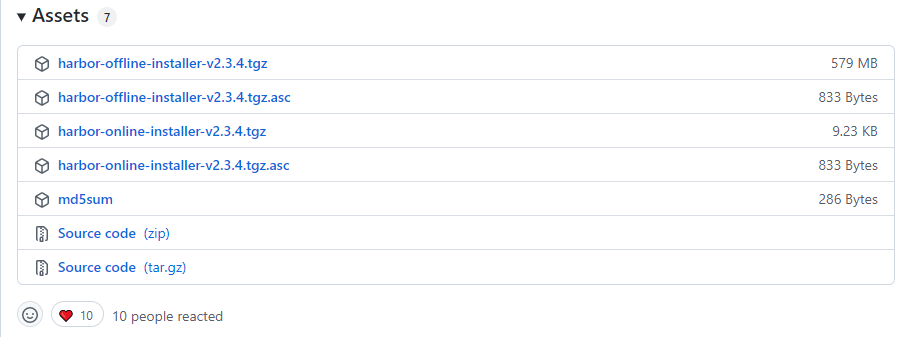
(下载地址:https://github.com/goharbor/harbor/releases)
如果选择在线安装直接wget就可以,此处我们采用离线安装(offline-installer),直接下载安装包然后解压
<code style="margin-left:0">[root@server1 ~]# tar zxf harbor-offline-installer-v2.3.4.tgz
[root@server1 ~]# cd harbor/
[root@server1 harbor]# ls
common.sh  harbor.v2.3.4.tar.gz  harbor.yml  install.sh  LICENSE  prepare</code>
然后我们编辑harbor,yml文件,修改hostname、https证书路径、admin密码(管理员账号和密码)
hostname:reg.westos.org
certificate:/root/certs/reg.westos.org.crt
private_key:/root/certs/reg.westos.org.key
harbor_admin_password:Harbor12345
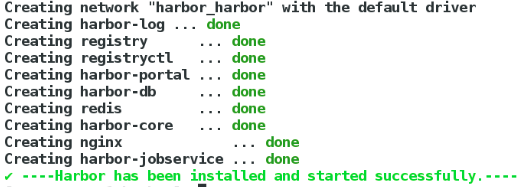
修改完成后编译运行查看
<code style="margin-left:0">[root@server1 harbor]# ./prepare
[root@server1 harbor]# ./install.sh </code>
访问测试
浏览器访问https://reg.westos.org:
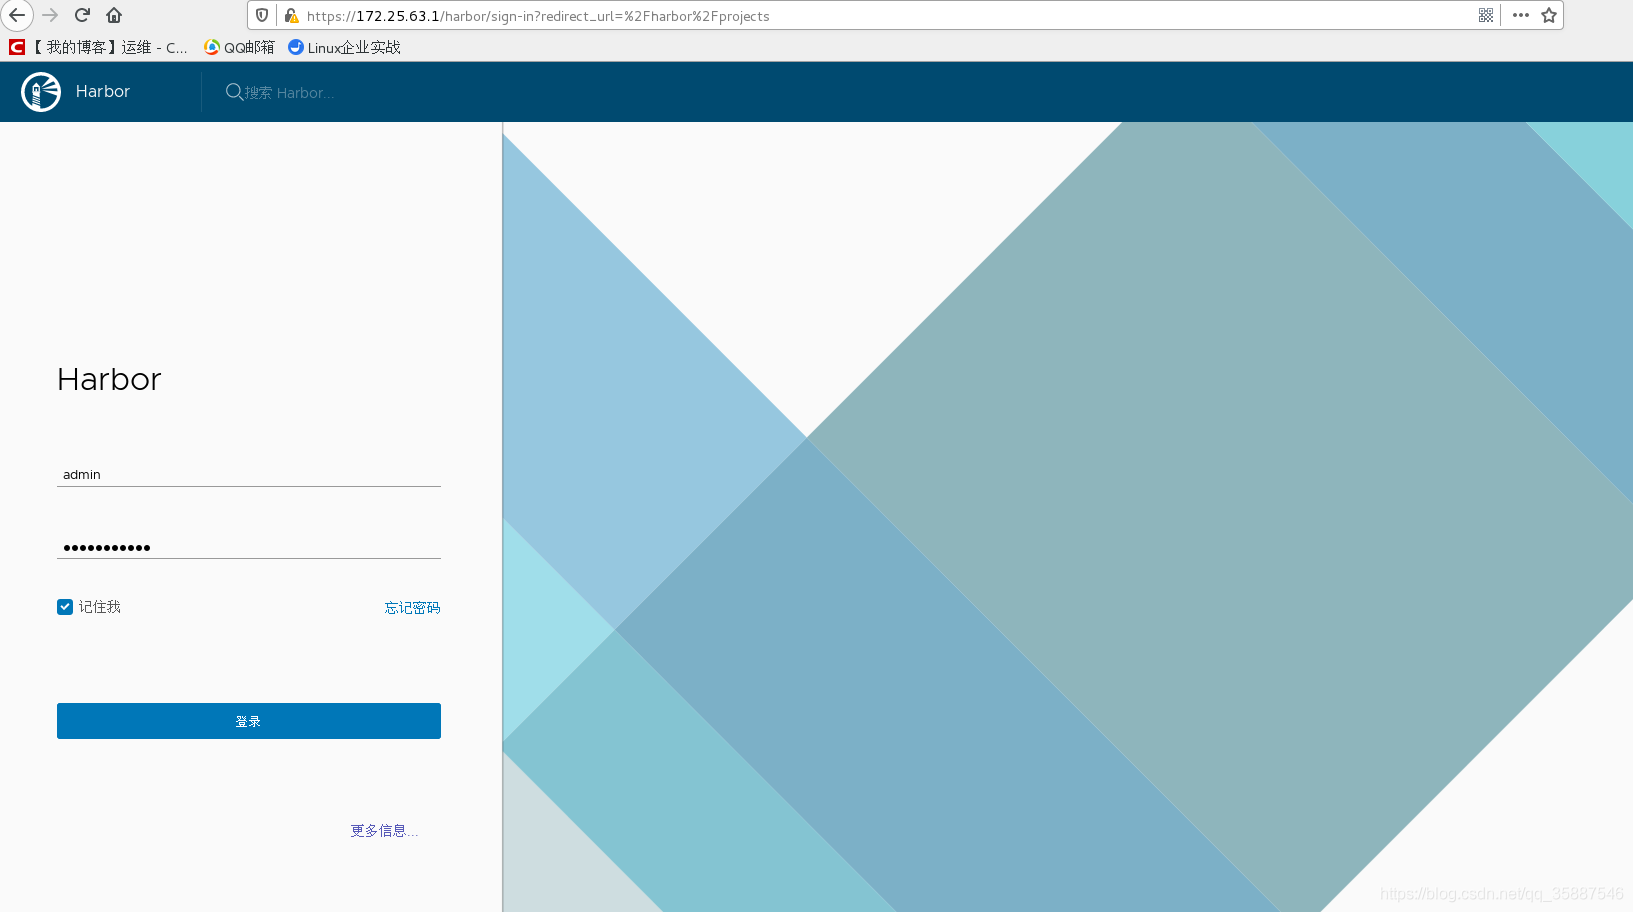
登录成功后
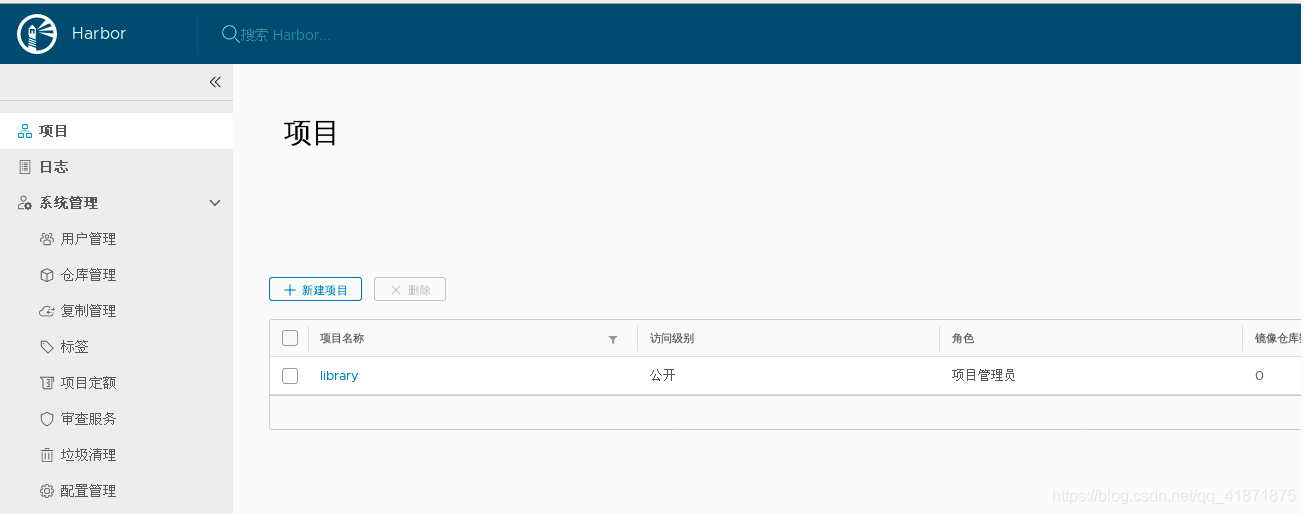
新建一个项目,命名为 westos,并设置访问级别为公开。

镜像的上传和拉取
修改文件 /etc/docker/daemon.json然后重启
<code style="margin-left:0">[root@server1 harbor]# cat /etc/docker/daemon.json
{
  "registry-mirrors": ["https://ioeo57w5.mirror.aliyuncs.com"]
}
{
"insecure-registries": ["reg.westos.org"]
}</code>
systemctl daemon-reload
systemctl restart docker
- 制作镜像(标记本地Ubuntu镜像,将其归入某一仓库。)
<code style="margin-left:0">docker tag ubuntu:latest reg.westos.org/westos/ubuntu:latest</code>
进行本机上传
首先登录私有库
<code style="margin-left:0">[root@server1 harbor]# docker login reg.westos.org
Username: admin
Password:
WARNING! Your password will be stored unencrypted in /root/.docker/config.json.
Configure a credential helper to remove this warning. See
https://docs.docker.com/engine/reference/commandline/login/#credentials-store

Login Succeeded</code>
然后上传
<code style="margin-left:0">[root@server1 harbor]# docker push reg.westos.org/westos/ubuntu</code>
然后查看上传结果

通过结果发现上传成功
然后我们先删除原先的镜像直接拉取
<code style="margin-left:0">[root@server1 harbor]# docker rmi reg.westos.org/westos/ubuntu
Untagged: reg.westos.org/westos/ubuntu:latest
Untagged: reg.westos.org/cl/ubuntu@sha256:e5dd9dbb37df5b731a6688fa49f4003359f6f126958c9c928f937bec69836320
[root@server1 harbor]# docker pull reg.westos.org/westos/ubuntu
Using default tag: latest
latest: Pulling from westos/ubuntu
Digest: sha256:e5dd9dbb37df5b731a6688fa49f4003359f6f126958c9c928f937bec69836320
Status: Downloaded newer image for reg.westos.org/westos/ubuntu:latest
reg.westos.org/westos/ubuntu:latest</code>
然后我们准备另一台主机server2
<code style="margin-left:0">[root@server2 ~]# cat /etc/hosts
172.25.74.1     server1 reg.westos.org    #做好解析</code>
daemon文件配置
<code style="margin-left:0">[root@server2 ~]# cat /etc/docker/daemon.json
{
  "registry-mirrors": ["https://reg.westos.org"]
}</code>
建立证书目录
<code style="margin-left:0">[root@server2 ~]# mkdir -p /etc/docker/certs.d/reg.westos.org</code>
把crt证书放到/etc/docker/certs.d/harbor.dinginfo.com目录下:
<code style="margin-left:0">[root@server2 ~]# ls /etc/docker/certs.d/reg.westos.org
reg.westos.org.crt</code>
然后,重启docker
<code style="margin-left:0">systemctl daemon-reload
systemctl restart docker</code>
然后我们直接登录
<code style="margin-left:0">[root@server2 ~]# docker login reg.westos.org
Username: admin
Password:
WARNING! Your password will be stored unencrypted in /root/.docker/config.json.
Configure a credential helper to remove this warning. See
https://docs.docker.com/engine/reference/commandline/login/#credentials-store

Login Succeeded</code>
上传镜像
<code style="margin-left:0">[root@server2 ~]# docker tag nginx:latest reg.westos.org/westos/nginx
[root@server2 ~]# docker push reg.westos.org/westos/nginx</code>
网页端查看

说明上传成功
测试下载:
<code style="margin-left:0">[root@server2 ~]# docker pull reg.westos.org/westos/ubuntu
Using default tag: latest
latest: Pulling from westos/ubuntu
5bed26d33875: Pull complete
f11b29a9c730: Pull complete
930bda195c84: Pull complete
78bf9a5ad49e: Pull complete
Digest: sha256:e5dd9dbb37df5b731a6688fa49f4003359f6f126958c9c928f937bec69836320
Status: Downloaded newer image for reg.westos.org/westos/ubuntu:latest
reg.westos.org/westos/ubuntu:latest</code>
- harbor配置成功
未经允许不得转载:木盒主机 » Harbor docker 部署安装

 木盒主机
木盒主机 搬瓦工VPS最新优惠码 搬瓦工最高优惠6.81%优惠码 promo coupon code
  RackNerd:美国VPS 黑五优惠折扣 1核768RAM $10.28/年+神秘盒子 可随机减免金额
 10G.BIZ【年终钜惠】美国/日本/韩国/香港独立服务器 秒杀仅24起,站群仅需99,三网CN2GIA五折抢购。CERA洛杉矶云服务器仅2.4起
 2022年RackNerd 美国VPS促销:4TB月流量11.88美元/年,支持支付宝,老优惠$9.89美元/年